Set Up Adaptive Card Notifications Via Help Desk Workflows
Notify Users When A Chat Session Is Resolved
Our enterprise chat platform includes chat FAQ lookup, Chat Q&A, integration with ChatGPT, and routing to service desk agents.
In this guide, you'll learn how to set up a workflow that automatically sends an adaptive card to a guest user after an agent marks a session as resolved. This pattern can use the chat workflow engine to monitor any chat session values and send information to the employee based on any updates to the metadata - in this case, when a service desk agents marks that as resolved using the agent UI.
Follow the steps below to create and configure this workflow in your Chime environment.
Step 1: Create a Workflow
- Navigate to the Chime Advanced > Workflows page via the Admin menu.
- Click the Create Workflow button in the top right corner.
Create a background workflow task to monitor the data in all active chat sessions
When the agent marks the chat session as resolved, the workflow engine will send the employee an adaptive card with the updated status
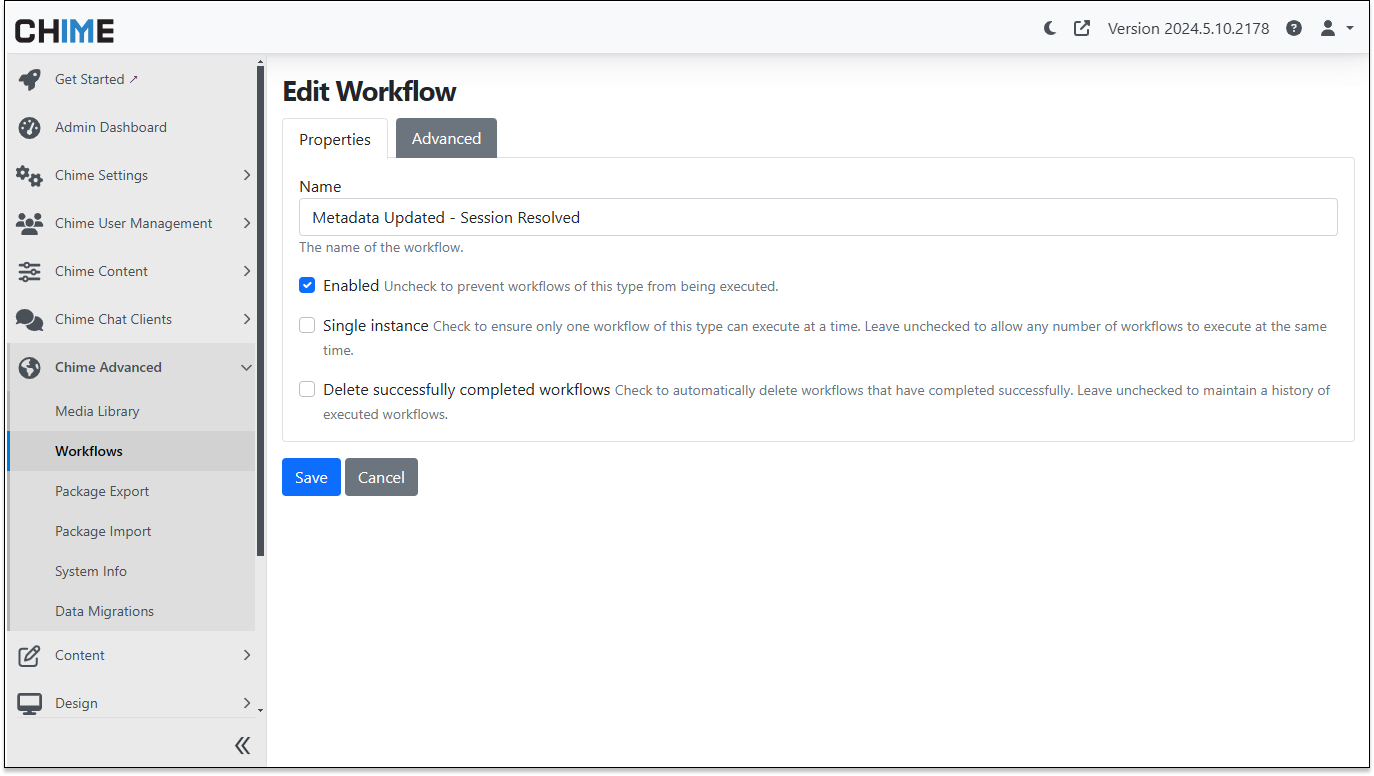
- Name the workflow and click Save.
Our chat platform uses the Orchard workflow engine
Any chat session can raise a workflow task - and workflow tasks can run in the background and monitor all active chat sessions
Step 2: Add Session Metadata Updated Event
- On the Workflow editor page, click the Add Event button.
Monitor workflow events to trap the event when a chat session has the underlying chat data changes state
Workflow events, combined with adaptive cards, are a group combination for chatbot FAQs and chat Q&A
- In the pop-up window, scroll through or search for Session Metadata Updated.
- Select the Add button next to the event.
Monitor with chat session metadata changes - and then send an adaptive card
The Orchard workflow engine is powerful and our chat platform connects to the Orchard workflow engine
- Name the event
- Uncheck the 'Execute on every metadata change' toggle
- Under the 'Selected Metadata Keys' field insert: Session.Status.IsResolved
Just filter on the event where the chat session is marked as resolved.
Our chat platform raises a lot of internal events - in this case, just filter the metadata where the chat status is marked as resolved
Step 3: Add If/Else Task
- On the Workflow editor page, click the Add Task button.
Add workflow task to monitor active chatbot sessions
Chime V5 has a workflow engine that monitors all active chatbot, and chatFAQ, sessions - and can trigger events and tasks -
- In the pop-up window, scroll through or search for If/Else.
- Select the Add button next to the task.
Our chat workflow engine includes conditional logic and JS
Conditional tasks may be created based on chatbot events and conditions with active chats in Chime and our employee assistance platform
- Name the task, input the condition expression, and click Save.
Condition Expression:
input("ChangedMetadata").find((element) => element.Key == "Session.Status.IsResolved").Value == "True"Add conditional workflow to any chat session
Here, active chat sessions are monitored and custom workflow events and tasks can notify employees of updates to the chat
Step 4: Add Send Adaptive Card Task
- On the Workflow editor page, click the Add Task button.
Easy send a Microsoft adaptive card using chat
Use chat to send an adaptive card
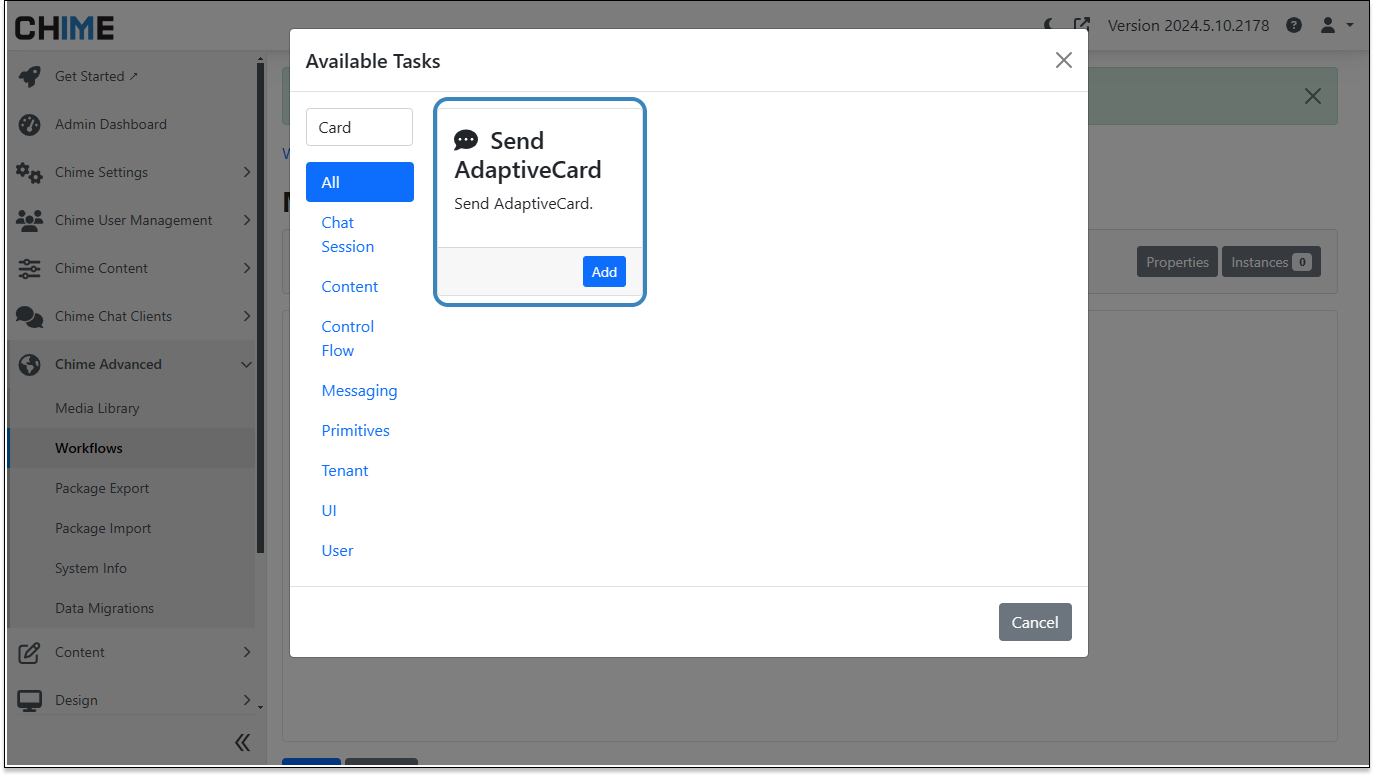
- In the pop-up window, scroll through or search for Send AdaptiveCard.
- Select the Add button next to the task.
Use chat within Microsoft Teams to send an adaptive card
Our chat platform includes an adaptive card library as well as a workflow engine that can easily respond to chat events with a custom adaptive card
- Name the task, input the Adaptive Card JSON, and click Save.
Adaptive Card JSON:
{
    "type": "AdaptiveCard",
    "version": "1.3",
    "$schema": "https://adaptivecards.io/schemas/adaptive-card.json",
    "body": [
        {
            "type": "TextBlock",
            "text": "Your issue is resolved: ${Session.Status.IsResolved}",
            "wrap": true
        }
    ]
}
Use workflow within Microsoft Teams to send an adaptive card
Use the Microsoft Adaptive Card designer to create custom adaptive cards delivered via chat to Microsoft Teams or a web chat channel
Step 5: Connect the Event and Task Modules
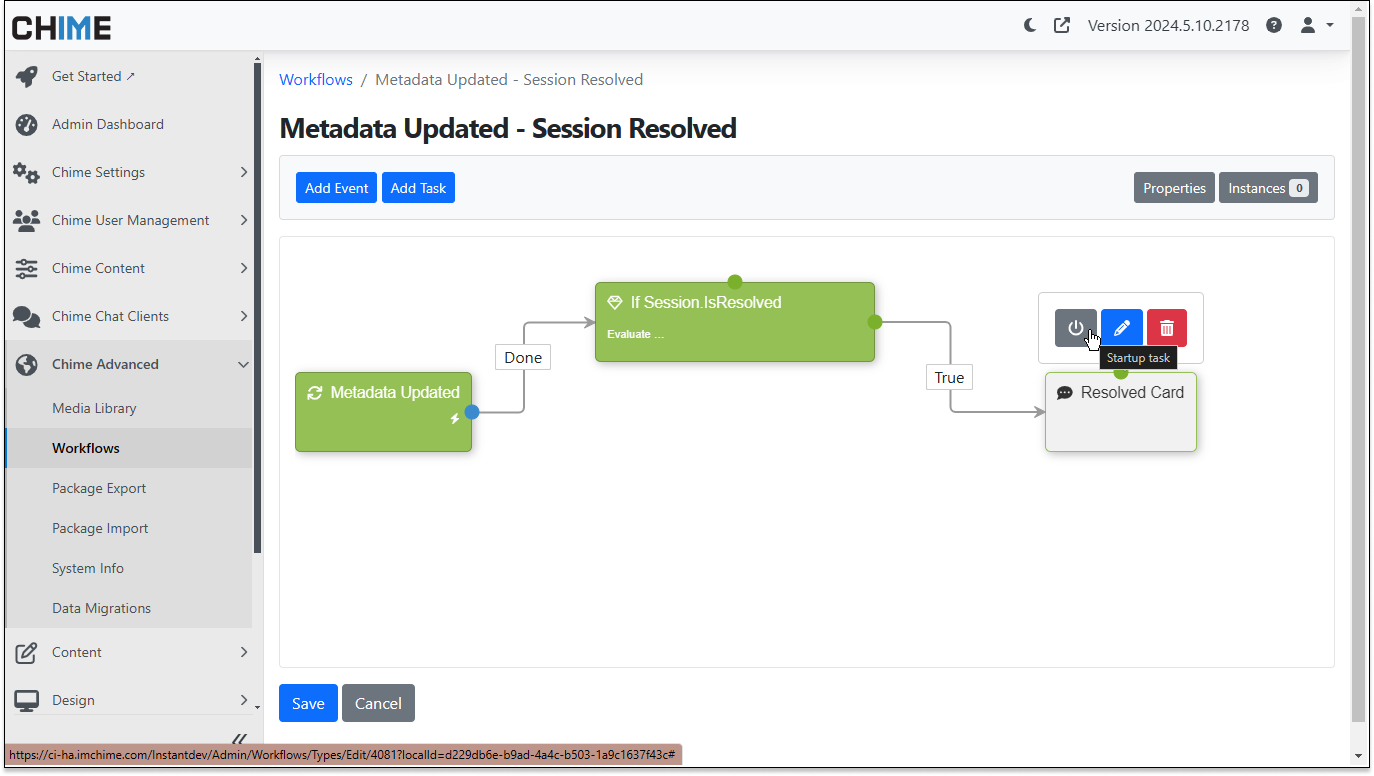
- In the Workflow editor, drag the blue dot from the event to the If/Else task to connect them.
- Next, drag the green dot labeled 'True' from the If/Else task to the Send Adaptive Card task. This ensures the workflow proceeds correctly when the condition is met.
Build custom workflow for chat sessions - respond to custom chat based events
Here you can configure what response you want to send for the function’s ‘True’ result
Step 6: Enable and Start the Event and Task Modules
- Select each module and click the power icon to enable and start it.
- Once all modules are enabled and displayed in green, click the Save button at the bottom of the screen to save the workflow.
Enable the stages and save to make your chat workflow active
If you ever want to make edits to the workflow, disable your stages first to ensure no failed instances
Testing the Workflow
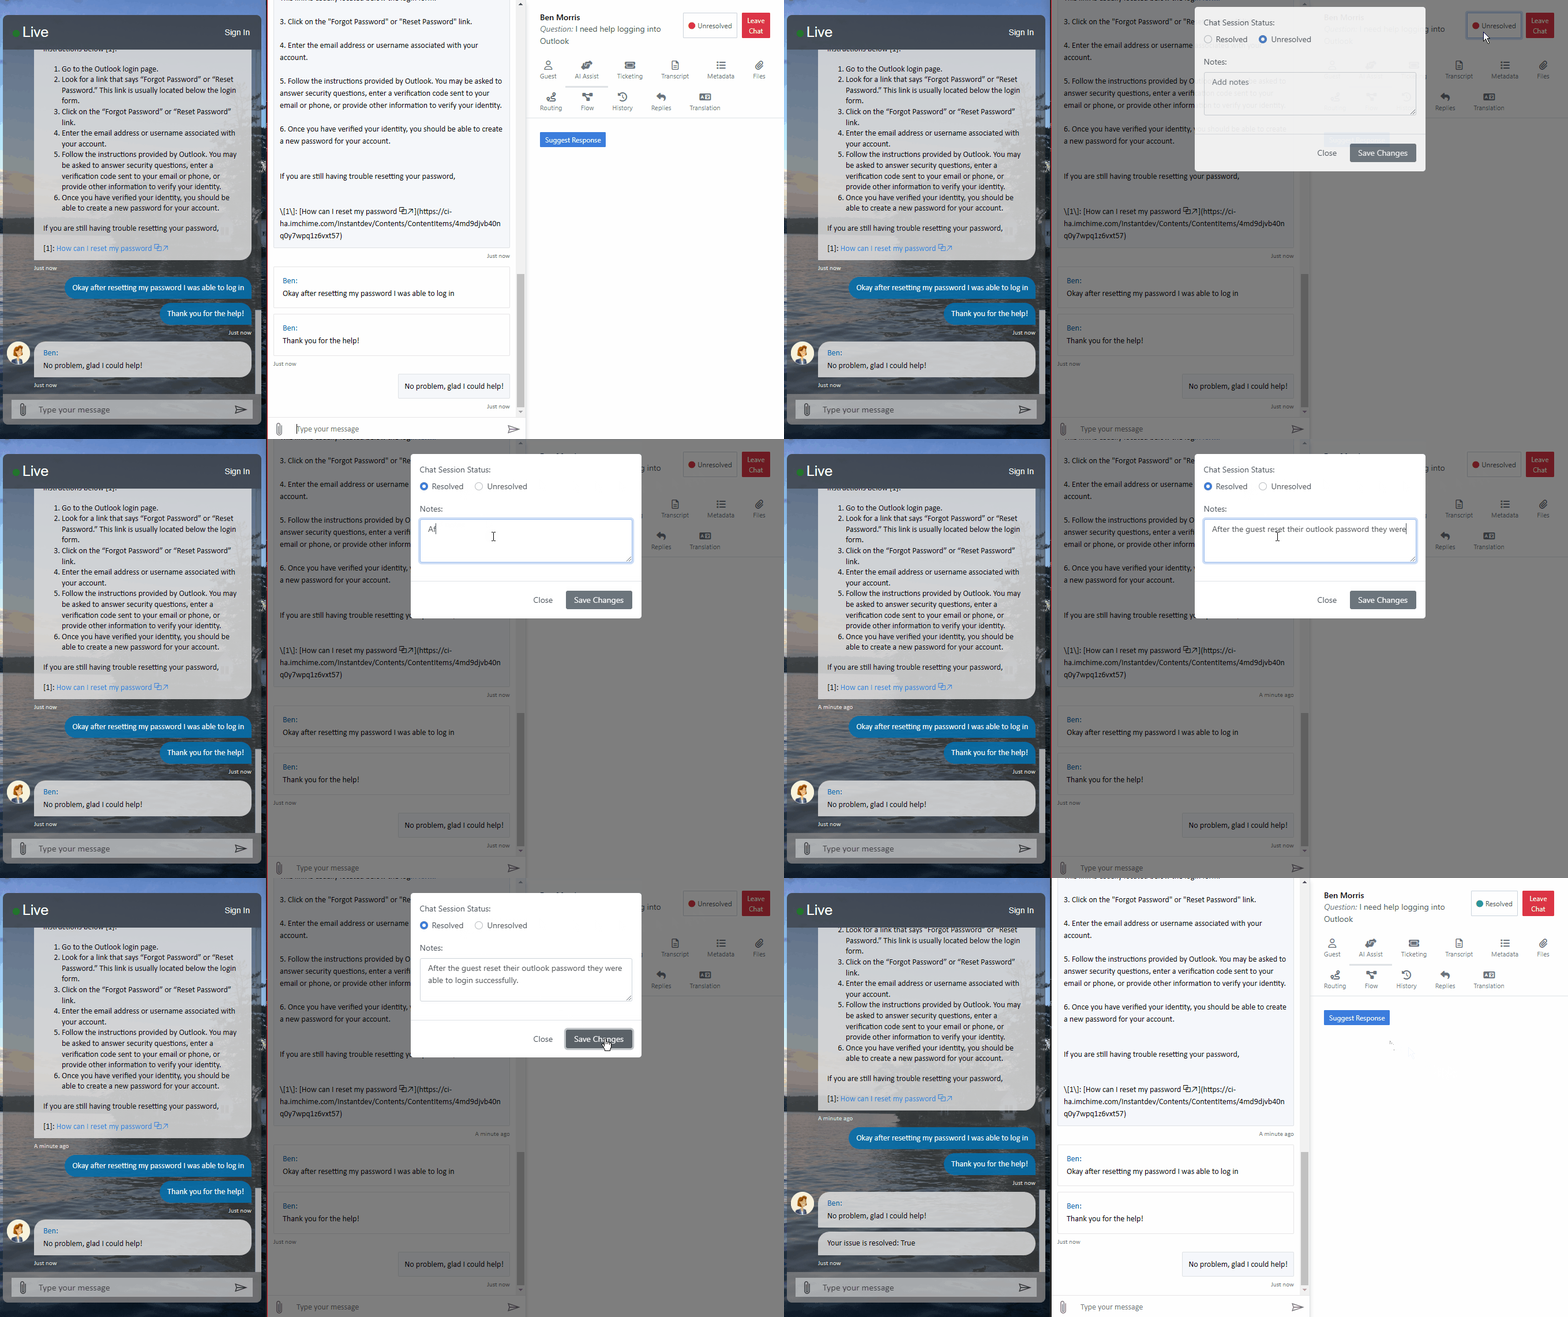
- Start a chat session and connect with an agent.
- Mark the session as resolved within the Agent UI.
- Verify that the guest user receives the adaptive card indicating their issue is resolved.
By following these steps, you can set up a simple workflow that enhances the customer experience by providing automated updates through adaptive cards.
Example of a chat FAQ app replying and routing to an agent
Enable your service desk agent to accept chats from employees and quickly solve employee problems using chat
Related Content
How to: Create a workflow that sends a card to guest when the session is resolved - FAQ Article
How to: Send custom HTML emails using the send email pipeline item or send email workflow task - FAQ Article
How to: Use workflows to send emails when content is created, deleted, published, updated etc… - FAQ Article


